How to turn Wasabi into a CDN with CloudFlare
To improve the performance of this site. I use Cloudflare as my CDN. The problem is with is CloudFlare caching is not very helpful for infrequently accessed files or larger files. But services like Wasabi’s S3 are excellent at hosting data at a low cost. Wasabi is terrific in the fact that they don’t charge fees for egress or API requests. You need to pay for the storage. Wasabi does offer public access out-of-the-box, but the speed isn’t the greatest, which is where Cloudflare comes into the picture. Wasabi and CloudFlare have a partnership. You can read more about it (here)[https://wasabi.com/solution-brief/cloudflare/].
Create a Bucket on Wasabi
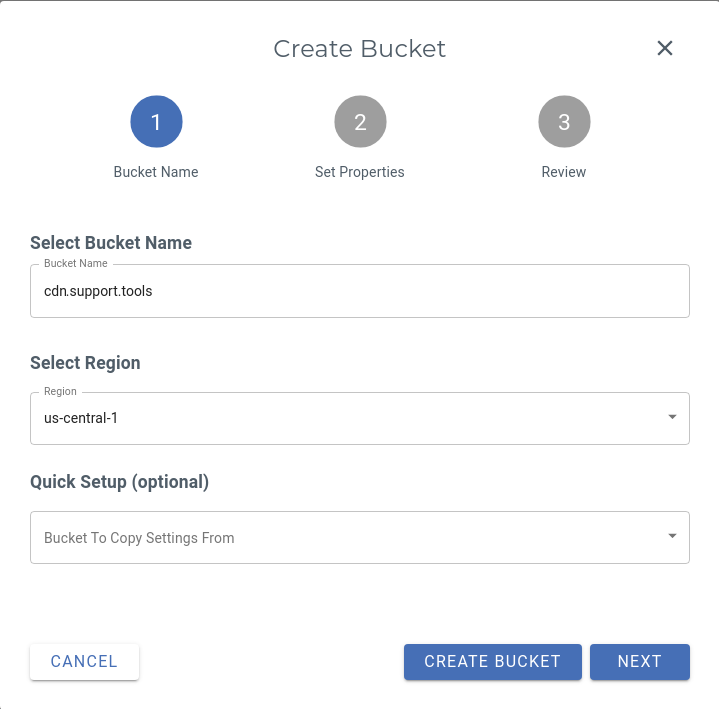
Start by creating a new bucket in Wasabi. Make sure that it has the same name as your domain or subdomain!
In this case, the bucket will be called cdn.support.tools.

You can select any region you like. I use us-central-1 because I’m located near Chicago, and so is my colo space.
Add a Policy
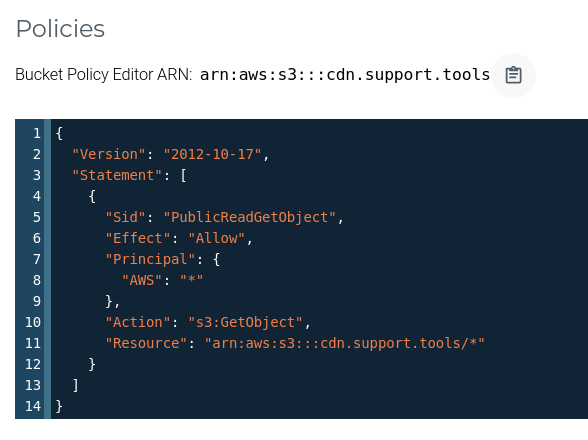
Next, you need to create a Bucket Policy, which makes every file in your bucket automatically world-readable.

Don’t follow the official tutorial here! The approach there would either require you to adjust permissions on every file manually, or it would not only make your bucket world-readable but also world writeable (and we wouldn’t want that, would we?).
The policy looks precisely as the one AWS is using:
{
  "Version": "2012-10-17",
  "Statement": [
    {
      "Sid": "PublicReadGetObject",
      "Effect": "Allow",
      "Principal": {
        "AWS": "*"
      },
      "Action": "s3:GetObject",
      "Resource": "arn:aws:s3:::cdn.support.tools/*"
    }
  ]
}
The critical bit is adjusting the ARN “arn:aws:s3:::cdn.support.tools/*” to your bucket name.
Apart from uploading the files you want to serve, that’s all there is to be done on Wasabi.
Add a CNAME record in Cloudflare
The next thing you have to do is creating a CNAME record in the DNS section of your Cloudflare account. Cloudflare provides a super unique feature they call CNAME Flattening. It’s a non-standard functionality that allows you to set a CNAME on the root of your domain and therefore pointing cdn.support.tools to Wasabi.

Now you need to remember the region of your bucket and look up the corresponding service URLs for Wasabi’s different areas in this document.
In my case, it is s3.us-central-1.wasabisys.com.
Fix the Index File Problem
According to the docs, that should be it. And indeed, it is now possible to request any file in your bucket under https://cdn.support.tools/file.png.
Unfortunately, something crucial is still missing. Unlike Amazon, Wasabi does not allow you to specify the default index and a default error file.
I’ve asked them if there is a trick I’m missing in a support request, and they made it 100% clear that they have no intention to solve that and consider their service to server-specific files instead of an entire website!
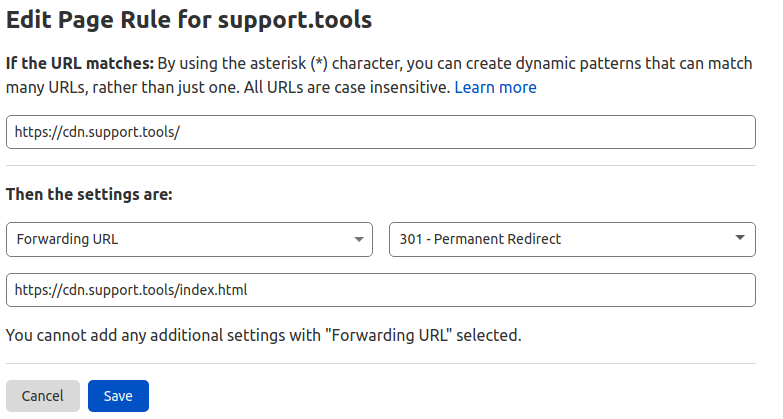
That’s a bit of a shame, I think. But fortunately, we can work around this limitation with a Cloudflare Page Rule that creates an HTTP 301 redirect forwarding requests with no path to an index file.
In my case, that would be:
https://cdn.support.tools/ –> https://cdn.support.tools/index.html
And this is how it looks on Cloudflare:

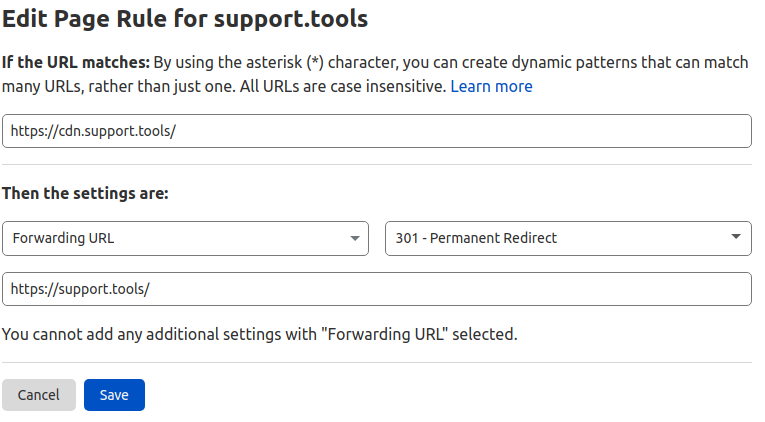
Note: In my case, I’m only going to be hosting static files on https://cdn.support.tools, so I have it configured to redirect to the main site https://support.tools

If you don’t have a page rule, Wasabi will return an XML page to list all the files in the bucket. This is fine because all these files are already open but let’s return everyone to the main page.